Italian Handkerchief, 16th-17th C.
As I was slowly starting to accumulate lace patterns, and testers made from my lace patterns, I realized I wanted to work on projects that could truly show my customers what can be done with my lace. Or any lace. Really, it’s so beautiful, I’m happy if I just enable you all to be lace addicts. Ok ok, in reality, I was thinking about the list of things *I* could make with this lace. I wanted: a ruff, an apron, a handkerchief, and a camicia.
My research involves looking at the lace pattern books of the time, but then also, looking at extant pieces to understand what lace should look like and figure out how to emulate that with my machine. And of course, getting any in-motion videos I can find, or lessons in lace-making I’ve taken myself. If you have ever taken a class with Grace Gamble (and believe me you should—several times) you may have ended up with a sample such as this below. It’s a fun thing to learn, and I highly suggest you check out her website, linked above, to spark your interest. We are essentially looking at knots in all sorts of directions.

My very basic first attempt at hand-made needle lace. Oh my, it needs some work!
As I was looking through extant samples (or while I was being spammed by Pinterest, when it figured out I like lace), I came across this very pretty handkerchief:

17th Century Italian handkerchief
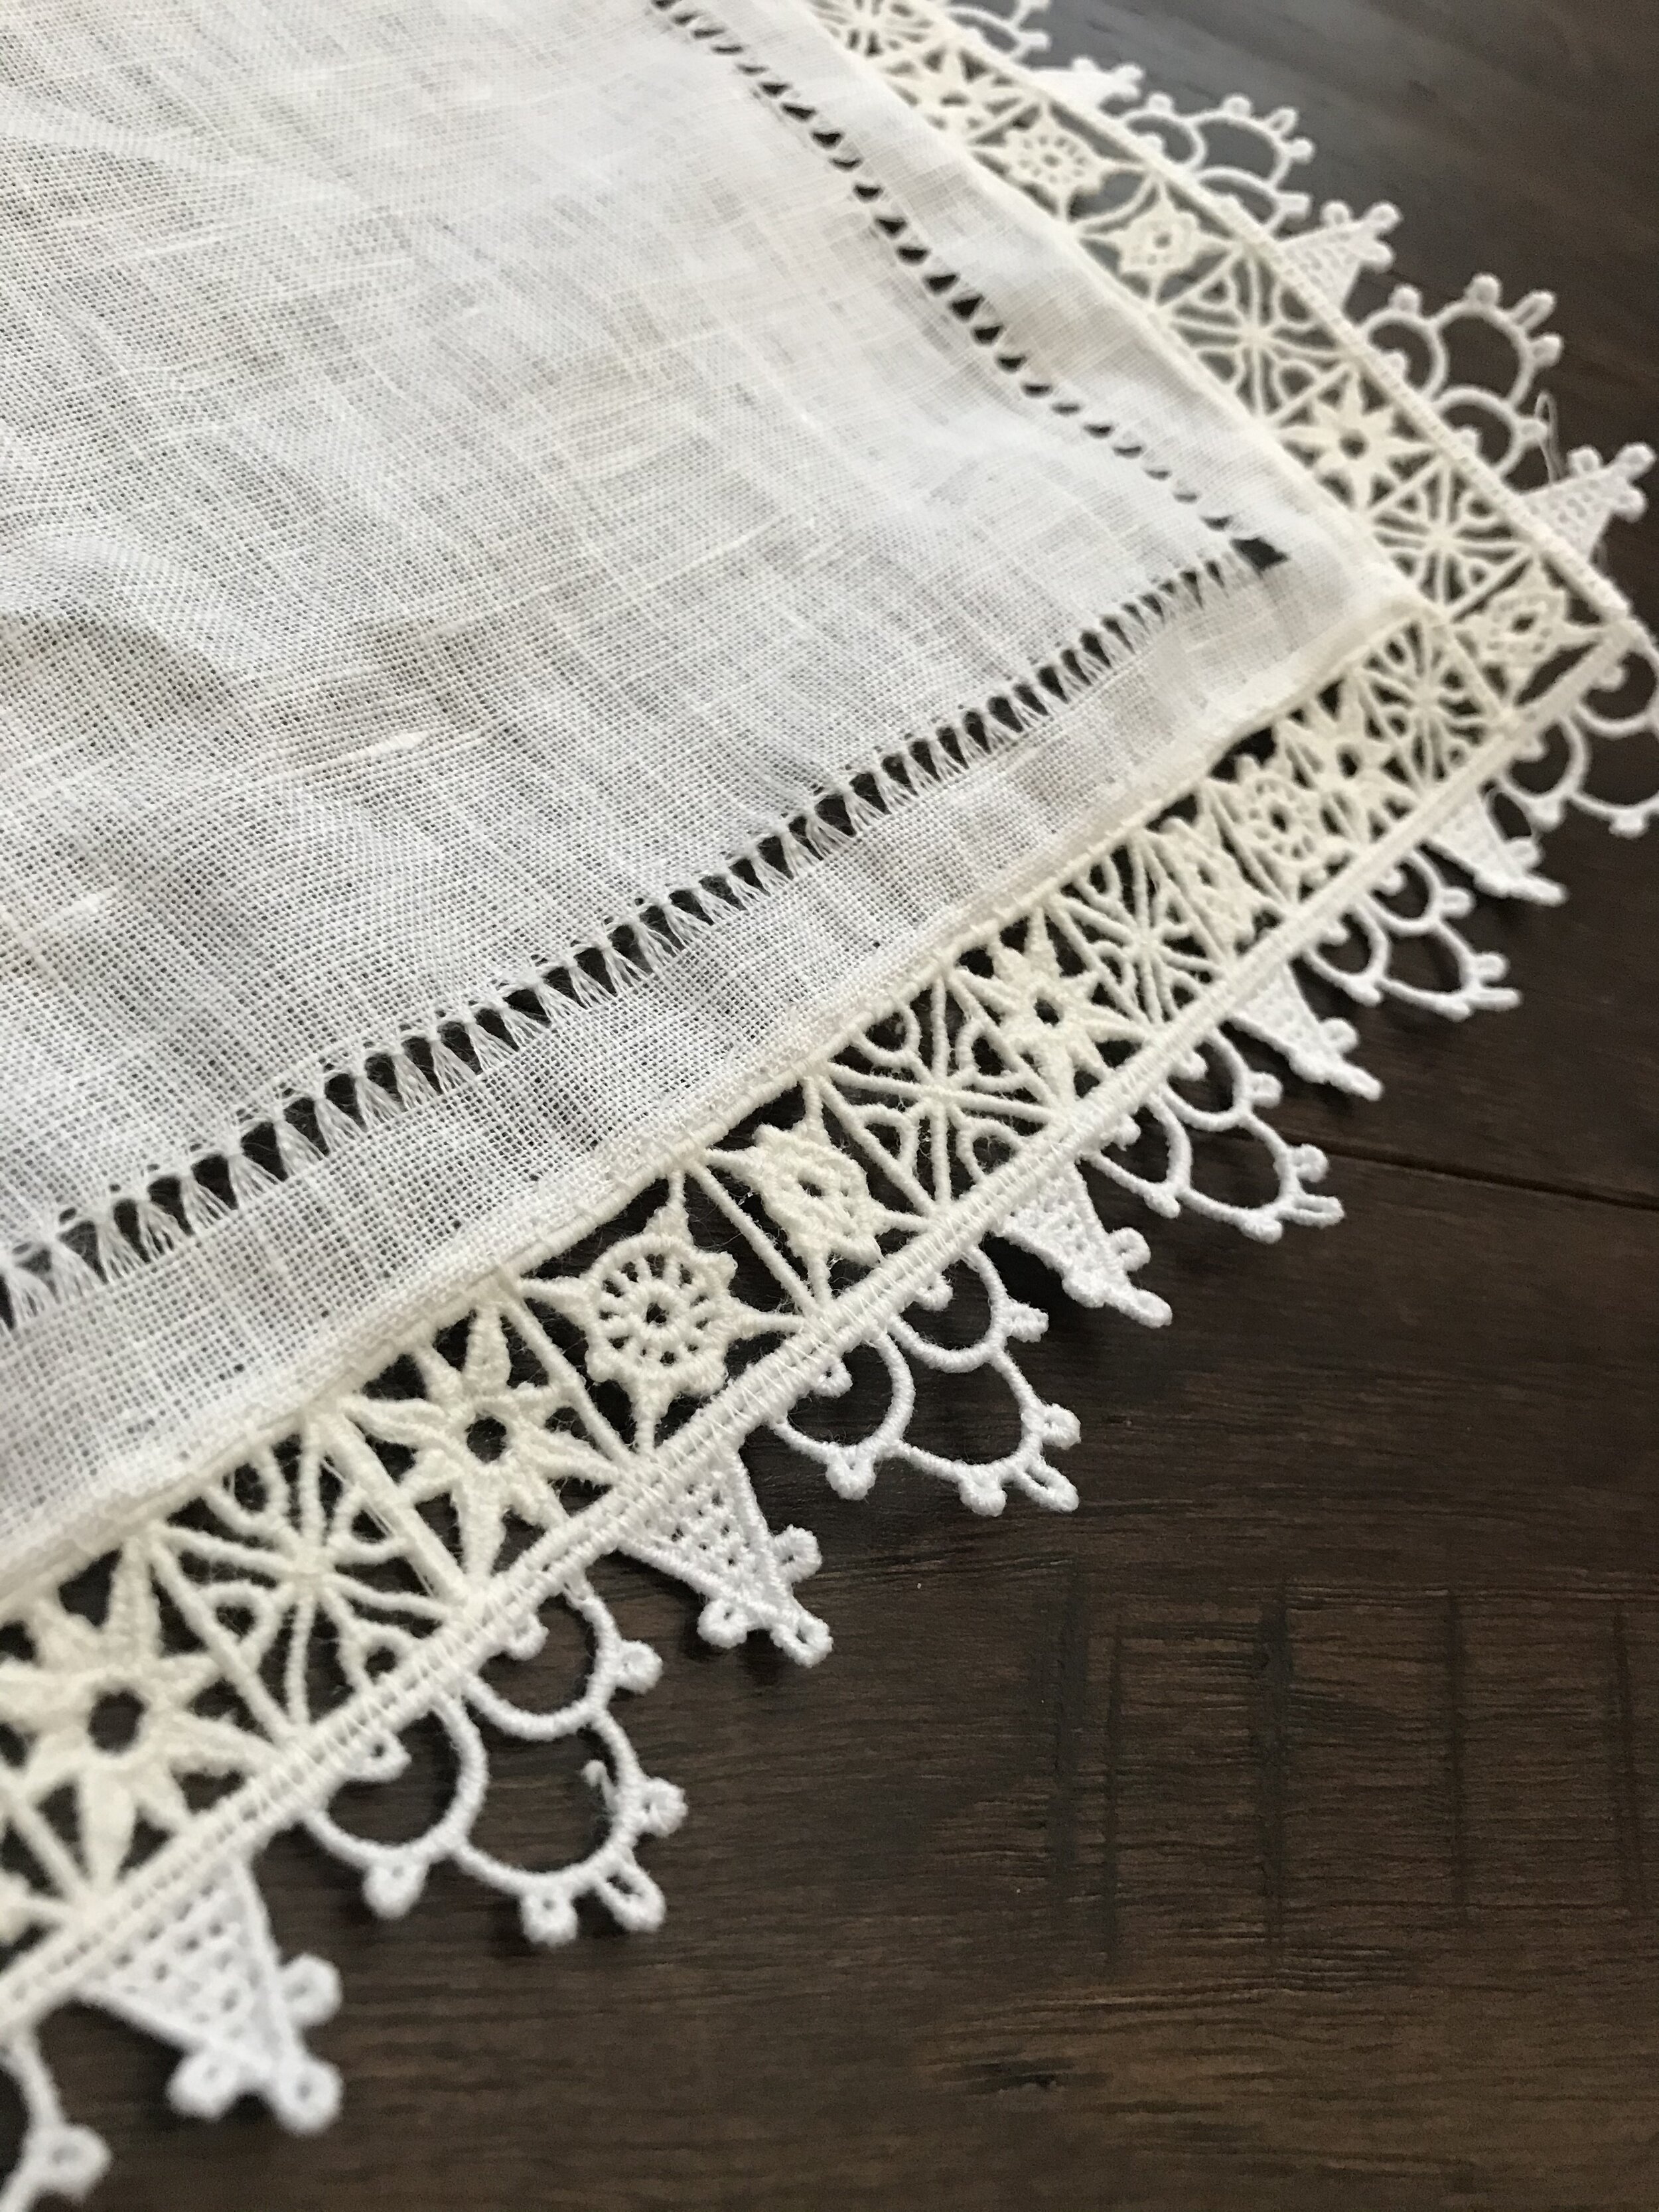
I wanted to emulate this. Not exactly make this. Which would require some serious skills. And some day, I will make a pattern like this one (someday!). Essentially I decided the basics of this sort of design are: Italian hem stitch with drawn thread work, a reticella sort of square type lace, and a smaller edging pattern.

First thing to do was hoop up my linen and start practicing Italian hem stitch. I highly recommend the Make it Coats videos of the single and double Italian hem stitch. Because they are super magnified and you know exactly what they are doing. The only bit they don’t show is removing the cross threads. I usually do this by picking with a pin every few stitches or so till i get the point i want to stop, then trim. I was actually very surprised by how easy this stitch is.


All done! Not too bad for first try.
Next I finished the edges with a rolled hem and began whip stitching the reticella lace onto the hem.

And once that was complete, I whip stitched the edging lace around it all.

Half way I got tired of hand stitching and decided to try using my machine to zigzag it on, using a small stitch length. It worked nicely.

And here we have it. Not too shabby.
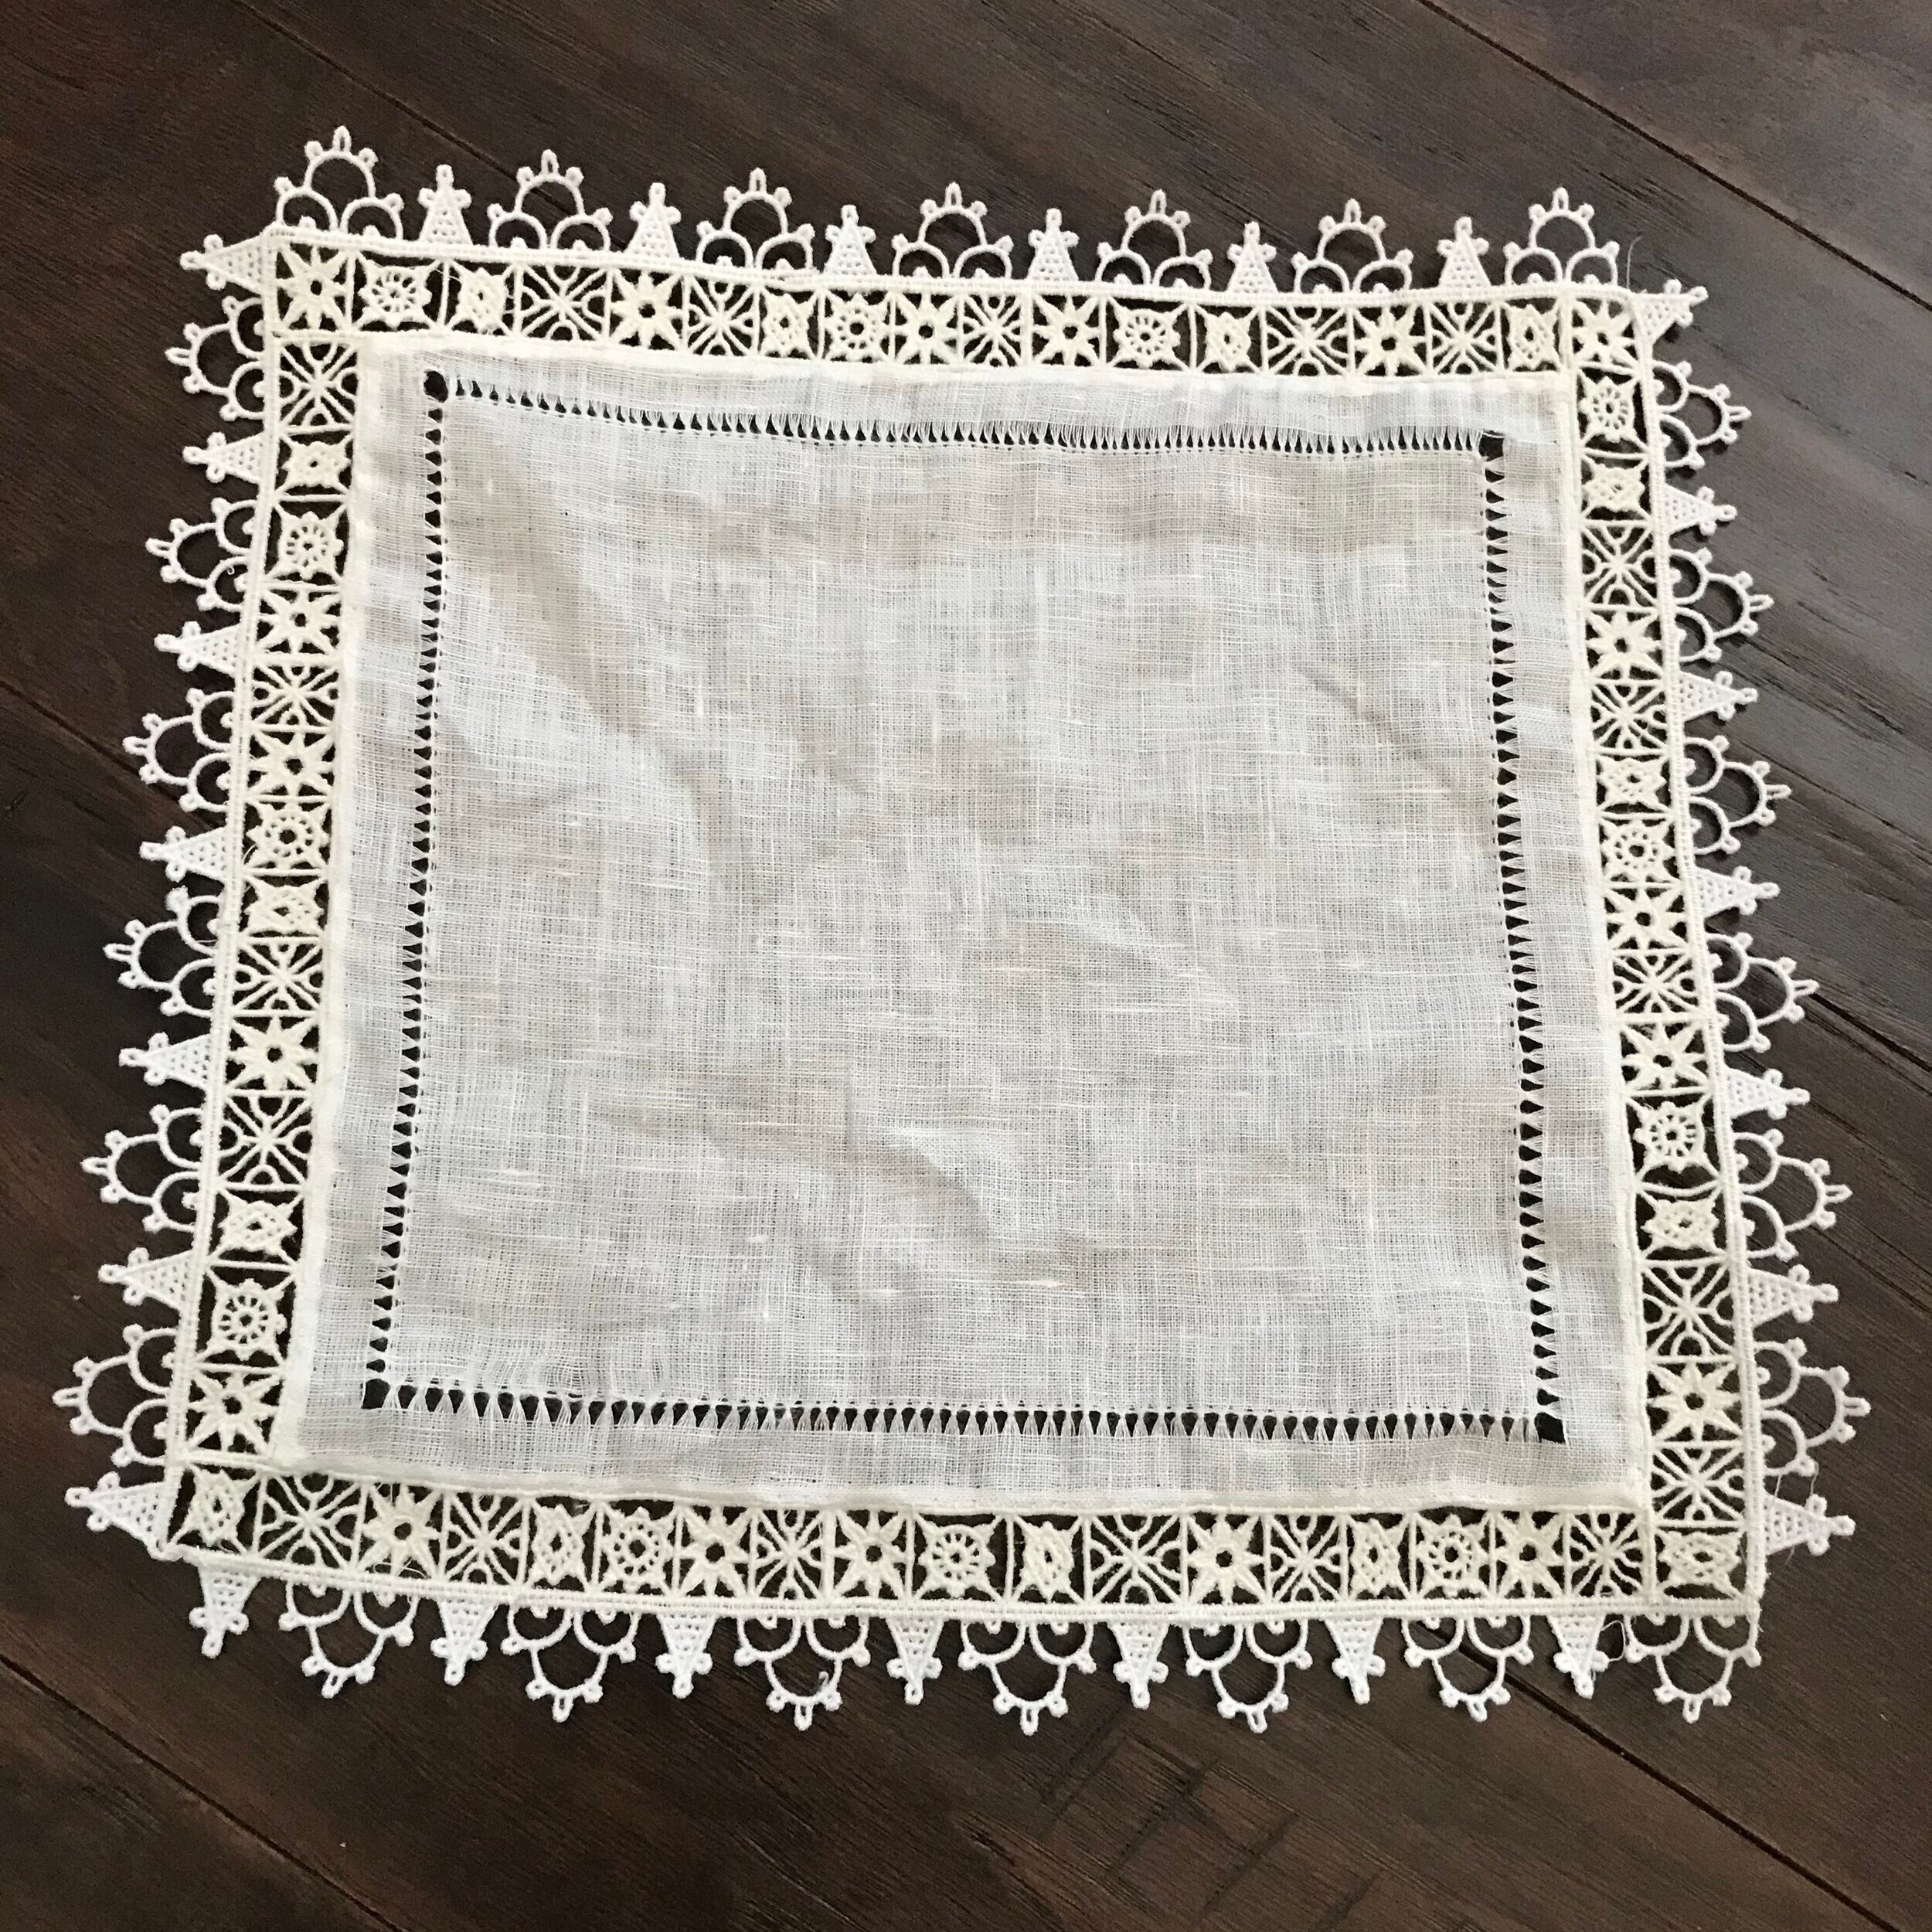

I got so excited to finish this project that I didn’t let my lace soak long enough and you can see bits of stabilizer still peeking through at places. Ah well, nothing another hand wash, dry, and press can’t fix.
The laces I used were 66” Vecellio “compass squares” (based off the pattern book by Cesare Vecellio, Corona delle Nobili et Virtuose Donne: Libro I-IV, 1601 edition), and the 63” Lattice Triangle edging lace (from the edgings of some more complex patterns in Newes Modelbuch in Kuppfer, by Johann Sibmacher, 1604 edition).
If you liked this project, you may like the handkerchief I made later, using machine made bobbin lace, and machine embroidered blackwork. I’m quite proud of it: